在「Azure Custom Vision 教學」我們使用 Azure Custom Vision 雲端服務建立了 Classification、Object Detection 專案,並且使用線上測試工具以及將專案發布,使用 REST API 測試了模型,確定可以順利運作,今天我們將使用 MCU Pixel:Bit 整合其中的 Object Detection 專案,使用 500 萬畫素相機拍照後自動呼叫 REST API,並將回傳的 Bounding Box、名稱,加註寫在 TFT 上,就讓我們開始吧!
一、所需材料
- Pixel:Bit * 1
二、規劃操作流程
- ready: 把 camera 拍攝畫面 stream 到 TFT
- capture: 當 button A 被按下,將影像資料傳到 Azure API ,同時將 TFT 中的畫面停格,影像設定為 240×240。
- predict: 回傳得到的 JSON 格式中,信心度高過門檻值者(預設0.75),將 bounding box 還有名稱加註寫在 TFT 畫面上。
- idle: 不做任何動作,直到 button B 被按下,將畫面清除回到第一步 ready 狀態。
三、安裝 Arduino Library
- CircusEasyUART:Pixel:Bit ESP32 與 ATmega328P 通訊用
- tca5405:Pixel:Bit 擴展 IO 用
- TFT_eSPI:Pixel:Bit TFT 顯示用
- TJpg_Decoder:將影像 Jpg 解碼用
四、修改設定檔
開啟之前訓練好的 Object Detection Project,切換到 Preformance 頁面點選 Prediction URL 查看你的資訊,對照下方格式,更換範例程式碼檔 config.h 內的定義。

格式範例:
| https://<API_HOST>/customvision/v3.0/Prediction/<Prediction_ID>/detect/iterations/<Iterations_ID>/image |

五、程式說明
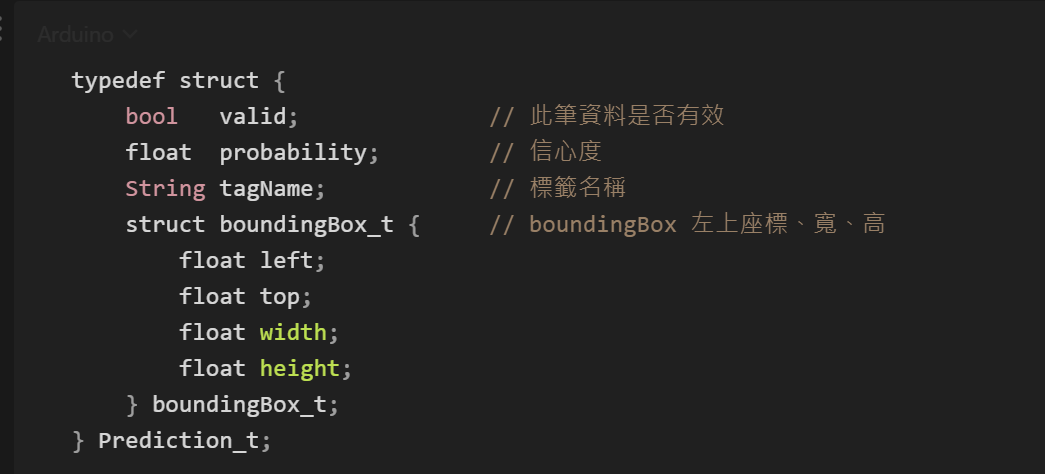
建立資料結構,存放雲端傳回的資料,API 回傳的 boundingBox 數值都介於 0~1,我們需要自行依照發送出去的照片解析度,將此數值乘上解析度寬與高才可得到正確位置,相關程式如下:
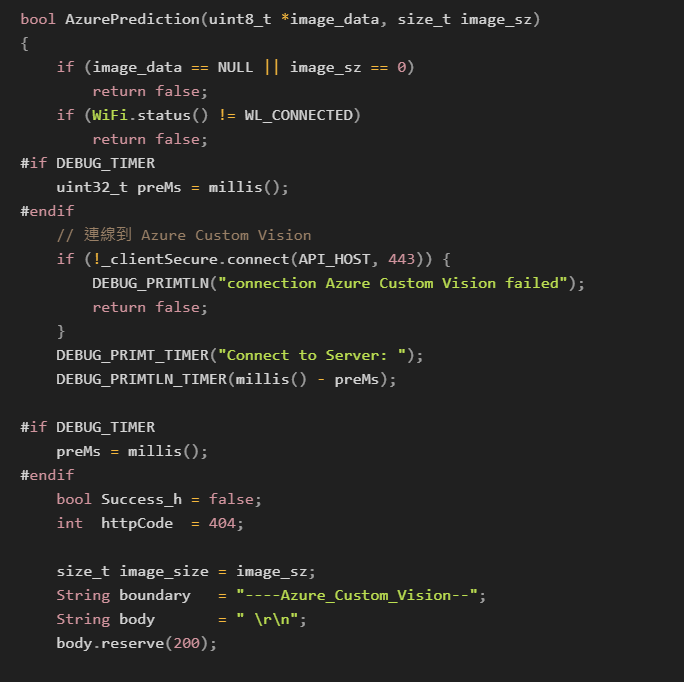
關於建立呼叫 Azure Prediction API 方法,傳入圖片資料、圖片資料長度的程式流程如下列步驟:
- 檢查參數
- 檢查 Wi-Fi 連線狀態
- 使用 HTTPS 連線到 Azure Custom Vision Host
- 計算並顯示連線花費時間
- 建立 HTTP 封包
- 使用 TLS Client 發送 HTTP 封包
- 計算並顯示發送封包花費時間
- 等待 Server 回傳資料
- 檢查連線並接收資料
- 檢查 HTTP Response Code
- 跳過 HTTP Packet Response Header
- 讀取 HTTP Response Body 並解析 Json 資料存入 Prediction_t 結構內
- 關閉 TLS Client 連線
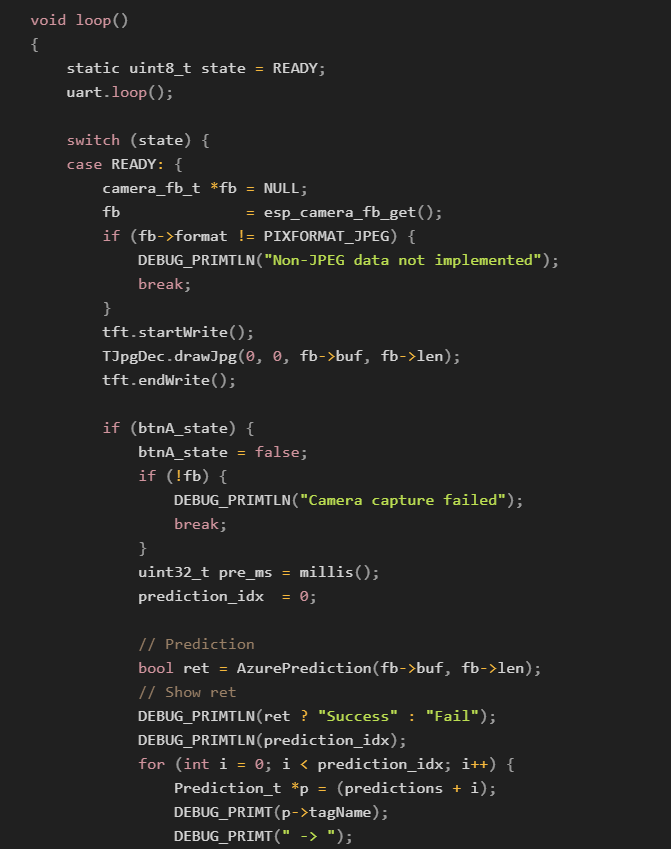
而 Arduino Loop Function 的程式流程如下列步驟:
- 接收 ATmega328P 資料
- READY 狀態使用 SPI DMA 串流相機畫面到 TFT上
- 按下 Pixel:Bit A 按鍵後將當前影像傳入 AzurePrediction Function
- 依照 AzurePrediction Function Return code 尋訪所有 Prediction_t Array,並將各個物件 boundingBox_t、tagName 畫在 TFT 上
- 計算並顯示總花費時間
六、驗證
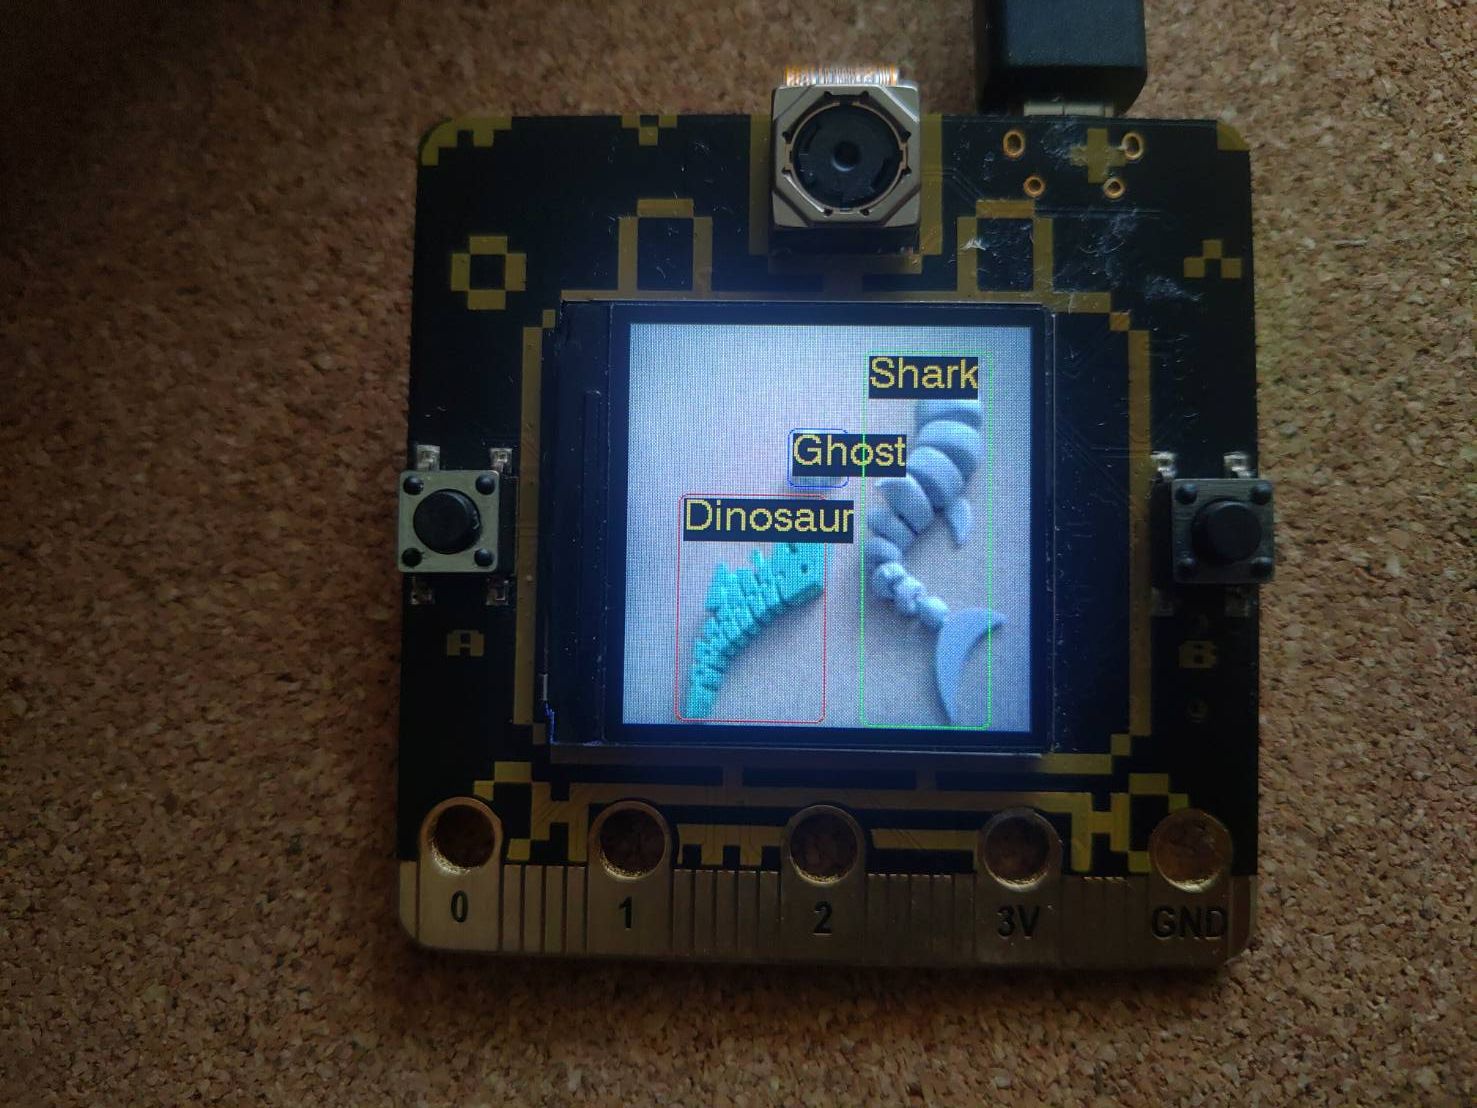
預設相機影像串流到 TFT 顯示,按下 A 鍵將影像發送到 Azure Custom Vision 推論,並將回傳資料顯示繪製在 TFT 上,按下 B 鍵繼續串流影像到 TFT 顯示。
七、小結
以上就是將 Azure Custom Vision 結合到 Pixel:Bit 的過程,經過多次測試後平均單次發送到回傳時間為 2.7 秒,與「Azure Custom Vision 教學(三)」使用電腦 Postman 呼叫 API 比起來多了將近一倍的時間,2.7 s/FPS,如果想要做到時實辨識看起來是比較沒有機會,但是對於一些不需要即時辨識又想要實現物件辨識的場合還是蠻有用的。